
- English
- Español
- Português
- русский
- Français
- 日本語
- Deutsch
- tiếng Việt
- Italiano
- Nederlands
- ภาษาไทย
- Polski
- 한국어
- Svenska
- magyar
- Malay
- বাংলা ভাষার
- Dansk
- Suomi
- हिन्दी
- Pilipino
- Türkçe
- Gaeilge
- العربية
- Indonesia
- Norsk
- تمل
- český
- ελληνικά
- український
- Javanese
- فارسی
- தமிழ்
- తెలుగు
- नेपाली
- Burmese
- български
- ລາວ
- Latine
- Қазақша
- Euskal
- Azərbaycan
- Slovenský jazyk
- Македонски
- Lietuvos
- Eesti Keel
- Română
- Slovenski
- मराठी
- Srpski језик


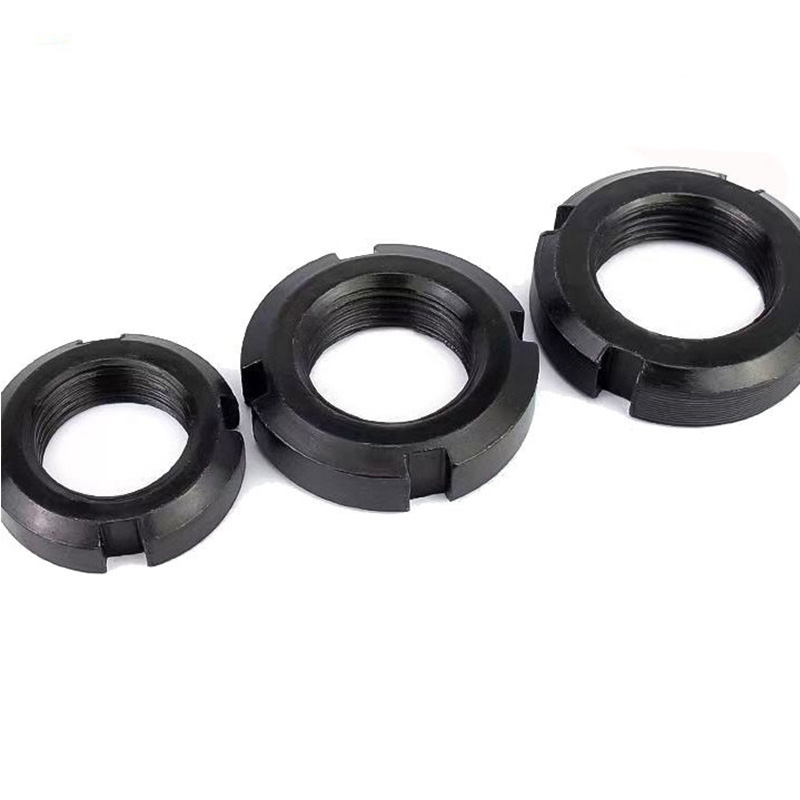
DIN 1804 Nut
China supplier and manufacturer Xiaoguo® specializes in DIN 1804 nut that can be reused. The product offers high cost-effectiveness and can effectively reduce maintenance costs over the long term. If you purchase the Bulk DIN 1804 nuts, you will get a more favorable price.
Send Inquiry
Product Description
Installation tools
Although the DIN 1804 nut has a simple structure, correct installation is the key to ensuring its locking performance.
(1)Core tool: Hook-type wrench (must be used), the common standard is DIN 1810.
There are various forms:
1)Fixed type with raised nose: Compliant with DIN 1810 standard, it is the most widely used standard option.
2)Hinged/Adjustable type: One tool covers multiple specifications, suitable for situations with variable working conditions.
3)Kit type: Such as an 8-piece set, containing various specifications, facilitating centralized management and use.
(2)Auxiliary tools: Torque wrench: To ensure precise control of locking force, many hook-type wrenches are designed with square tongue interfaces that can be connected to torque wrenches. (3)Anti-loosening accessories: To achieve the anti-loosening effect, the nut must be paired with the corresponding anti-loosening device, such as a locking washer or thread locking adhesive.

Installation steps
(1)Preparation before Installation
Confirm specifications: Ensure that the thread specification of the DIN 1804 nut is consistent with that of the shaft.
Cleaning inspection: Thoroughly clean the shaft, nut threads and key mating surfaces, and check for any burrs or damages.
Confirm the load-bearing surface: During installation, the side of the nut with the finely machined surface must face the bearing or the end face of the workpiece.
(2)Initial tightening
Manual insertion: Align the nut with the shaft end in advance, and then insert it by hand for 2 to 3 turns.
(3)Anti-loosening device
Install the locking washer according to the anti-loosening scheme (the inner tongue should align with the keyway on the shaft) or apply the thread locking adhesive.
(4)Final tightening
Carefully insert the protruding nose of the hook wrench into the groove of the nut (note that starting from the M45x1.5 specification, the nut has 6 grooves, and you need to apply force more evenly)
(5)Locking and Confirmation
Using mechanical anti-loosening (locking ring): After tightening the nut, bend the outer tongue of the ring and insert it into any slot of the nut to achieve mechanical locking.
Use chemical anti-loosening (thread locking adhesive): Apply it after cleaning the threads and before tightening, and wait for it to cure.
Final inspection: Use a torque wrench to recheck the torque.

| Mon | M3.5 | M4 | M5 | M6 | M8 | M10 | M12 | M14 | M16 | M18 | M20 |
| P | 0.6 | 0.7 | 0.8 | 1 | 1.25 | 1.5 | 1.75 | 2 | 2 | 2.5 | 2.5 |
| dk max | 7 | 8 | 9 | 11 | 14 | 18 | 21 | 24 | 26 | 29 | 32 |
| dk min | 6.64 | 7.64 | 8.64 | 10.57 | 13.57 | 17.57 | 20.48 | 23.48 | 25.48 | 28.48 | 31.38 |
| k max | 3 | 3.5 | 4.2 | 5 | 6.5 | 8 | 10 | 11 | 12 | 13 | 14 |
| k min | 2.75 | 3.2 | 3.9 | 4.7 | 6.14 | 7.64 | 9.64 | 10.57 | 11.57 | 12.57 | 13.57 |
| n min | 1.46 | 1.46 | 2.06 | 2.56 | 3.06 | 3.57 | 4.07 | 4.07 | 4.07 | 4.07 | 5.07 |
| n max | 1.71 | 1.71 | 2.31 | 2.81 | 3.31 | 3.87 | 4.37 | 4.37 | 4.37 | 4.37 | 5.37 |
| t min | 1 | 1.2 | 15 | 2 | 2.5 | 3.2 | 3.8 | 3.8 | 3.8 | 4.8 | 4.8 |
| t max | 1.40 | 1.60 | 1.90 | 2.4 | 3 | 3.7 | 4.3 | 4.3 | 4.3 | 5.5 | 5.5 |
Installation Instructions
(1)Do not confuse the load-bearing surfaces: Ensure that the finely machined d3 surface is in close contact, with the rough surface facing the direction of tool operation.
(2)The torque value is of crucial importance: an excessively high torque may damage the threads or cause the shaft to deform; an insufficiently high torque results in insufficient pre-tightening force, making the DIN 1804 nut prone to loosening.
(3)Proper use of tools: Ensure that the size of the socket wrench exactly matches the outer diameter of the nut to avoid damaging the slot.
(4)The preload force should be taken into account: When used for bearing preload, it is necessary to precisely set the preload force using professional methods.
(5)Regular inspection: During the initial operation of the equipment or after major repairs, it is necessary to conduct regular checks on the locking status of the nuts to prevent loosening.
Hot Tags: DIN 1804 Nut, China, Manufacturer, Supplier, Factory
Related Category
Hexagon Nut
Square Nut
Hexagon Flange Nut
Lock Nut
Cap Nut
Hexagon Slotted Nut
Hand Screw The Nut
Round Nut
Hubs Nuts
T-nut
Reed Nut
Other Nuts
Send Inquiry
Please Feel free to give your inquiry in the form below. We will reply you in 24 hours.