
- English
- Español
- Português
- русский
- Français
- 日本語
- Deutsch
- tiếng Việt
- Italiano
- Nederlands
- ภาษาไทย
- Polski
- 한국어
- Svenska
- magyar
- Malay
- বাংলা ভাষার
- Dansk
- Suomi
- हिन्दी
- Pilipino
- Türkçe
- Gaeilge
- العربية
- Indonesia
- Norsk
- تمل
- český
- ελληνικά
- український
- Javanese
- فارسی
- தமிழ்
- తెలుగు
- नेपाली
- Burmese
- български
- ລາວ
- Latine
- Қазақша
- Euskal
- Azərbaycan
- Slovenský jazyk
- Македонски
- Lietuvos
- Eesti Keel
- Română
- Slovenski
- मराठी
- Srpski језик


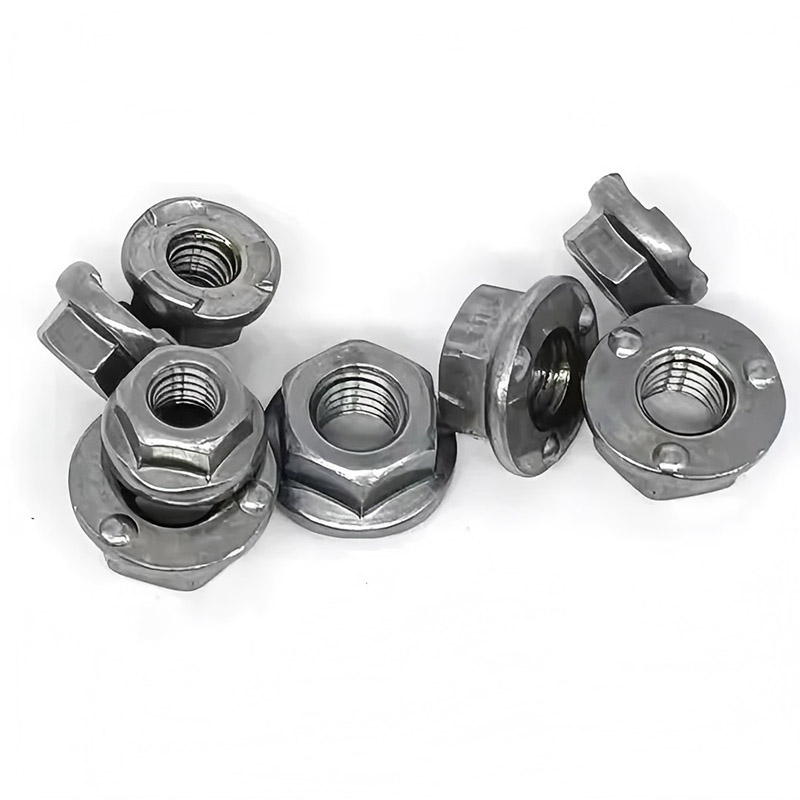
6 Projection Hex Weld Nut with Flange
China supplier and manufacturer Xiaoguo® 6 projection hex weld nut with flange is produced through precise cold heading process, ensuring uniform welding points and even welding quality. The factory has high production efficiency and the product qualification rate is as high as 99.8%, which can meet the large-scale purchasing needs of customers.
Send Inquiry
Product Description
How to use 6 projection hex weld nut with flange?
The correct use of 6 projection hex weld nut with flange involves three steps: pre-welding preparation, welding operation, and post-weld inspection and bolt assembly.
【1】Pre-weld preparation
(1)Confirm the specifications of the nuts
Check whether the thread specifications, performance grades, and surface treatments are consistent with the design. Using incorrect specifications will result in the bolts not fitting properly or insufficient welding strength.
(2)Inspect the base material
The base material should be a weldable metal (such as low-carbon steel, galvanized steel, stainless steel, etc.), with a thickness within the recommended range for the nut (typically 0.8 to 3.0 mm)

【2】Welding operation
(1)Manual welding (for single pieces or small batches)
Place the 6 projection hex weld nut with flange on the lower electrode positioning pin, with the flange surface facing down and the protrusions in contact with the workpiece.
Cover the workpiece (the base material) over the nut, so that the protrusions of the nut come into close contact with the workpiece.
Start the welding machine, lower the upper electrode, apply pressure and turn on the power.
Maintain the pressure for a short period (pressure retention), causing the molten core to solidify.
Lift the electrode and remove the workpiece.
(2)Automated Welding (Large Batch)
Using a vibrating table for automatic feeding, the nuts are sent into the lower electrode positioning chamber.
Robots or conveyor belts move the workpieces to the welding station.
The welding process is controlled by PLC and the parameters are monitored in real time.
Automatic discharge after welding.

| Thread Sized | M5 | M6 | M8 | M10 | M12 | M14 | M16 | ||
| d | |||||||||
| P | Coarse Thread Pitch | 0.8 | 1 | 1.25 | 1.5 | 1.75 | 2 | 2 | |
| Fine Thread Pitch | / | / | / | / | 15 | 1.5 | 1.5 | ||
| C | Nominal Size | ±0.1 | 0.8 | 0.8 | 1 | 1.2 | 1.2 | 1.2 | 1.2 |
| dc | max | 15.5 | 18.5 | 22.5 | 26.5 | 30.5 | 33.5 | 36.5 | |
| min | 14.5 | 17.5 | 21.5 | 25.5 | 29.5 | 32.5 | 35.5 | ||
| e | min | 8.2 | 10.6 | 13.6 | 16.9 | 19.4 | 22.4 | 25 | |
| max | 8.5 | 10.9 | 14 | 17.5 | 20 | 23 | 26 | ||
| f | Nominal Size | ±0.25 | 1.7 | 2 | 2.5 | 3 | 3 | 4 | 4 |
| g | Nominal Size | ±0.1 | 4 | 5 | 6 | 7 | 8 | 8 | 8 |
| m | min | 4.7 | 6.64 | 9.64 | 12.57 | 14.57 | 16.16 | 18.66 | |
| max | 5 | 7 | 10 | 13 | 15 | 17 | 19.5 | ||
| S | max | 8 | 10 | 13 | 16 | 18 | 21 | 24 | |
| min | 7.64 | 9.64 | 12.57 | 15.57 | 17.57 | 20.48 | 23.48 | ||
| b | max=nominal size | 2.2 | 2.7 | 2.7 | 2.95 | 3.2 | 3.45 | 3.7 | |
| min | 2 | 2.5 | 2.5 | 2.75 | 3 | 3.25 | 3.5 | ||
| per 1000 unitsskg | / | 5.7 | 12.2 | 21.8 | 29.4 | 45.8 | / | ||
【3】Post-weld inspection
(1)Appearance: By visual inspection, check that the nut is not tilted, and the flange is tightly attached to the workpiece.
(2)Thread gauge: Use a thread gauge to test, the thread gauge passes smoothly, and the stop gauge stops.
(3)Torque test: Apply torque to the welded nut using a torque wrench. The nut does not rotate, and the weld point does not tear.
【4】Fastener assembly
After the 6 projection hex weld nut with flange are fixed, they can be used for installing the bolts.
(1)Thread alignment: First, use your hands to screw the bolt in 2 to 3 turns. Once it is confirmed to be smooth, then use a tool.
(2)Tightening torque: Use a torque wrench and control the torque according to the specifications.
(3)Disassembly: It can be easily disassembled using a regular wrench.
Hot Tags: 6 Projection Hex Weld Nut with Flange, China, Manufacturer, Supplier, Factory
Related Category
Hexagon Nut
Square Nut
Hexagon Flange Nut
Lock Nut
Cap Nut
Hexagon Slotted Nut
Hand Screw The Nut
Round Nut
Hubs Nuts
T-nut
Reed Nut
Other Nuts
Send Inquiry
Please Feel free to give your inquiry in the form below. We will reply you in 24 hours.