
- English
- Español
- Português
- русский
- Français
- 日本語
- Deutsch
- tiếng Việt
- Italiano
- Nederlands
- ภาษาไทย
- Polski
- 한국어
- Svenska
- magyar
- Malay
- বাংলা ভাষার
- Dansk
- Suomi
- हिन्दी
- Pilipino
- Türkçe
- Gaeilge
- العربية
- Indonesia
- Norsk
- تمل
- český
- ελληνικά
- український
- Javanese
- فارسی
- தமிழ்
- తెలుగు
- नेपाली
- Burmese
- български
- ລາວ
- Latine
- Қазақша
- Euskal
- Azərbaycan
- Slovenský jazyk
- Македонски
- Lietuvos
- Eesti Keel
- Română
- Slovenski
- मराठी
- Srpski језик


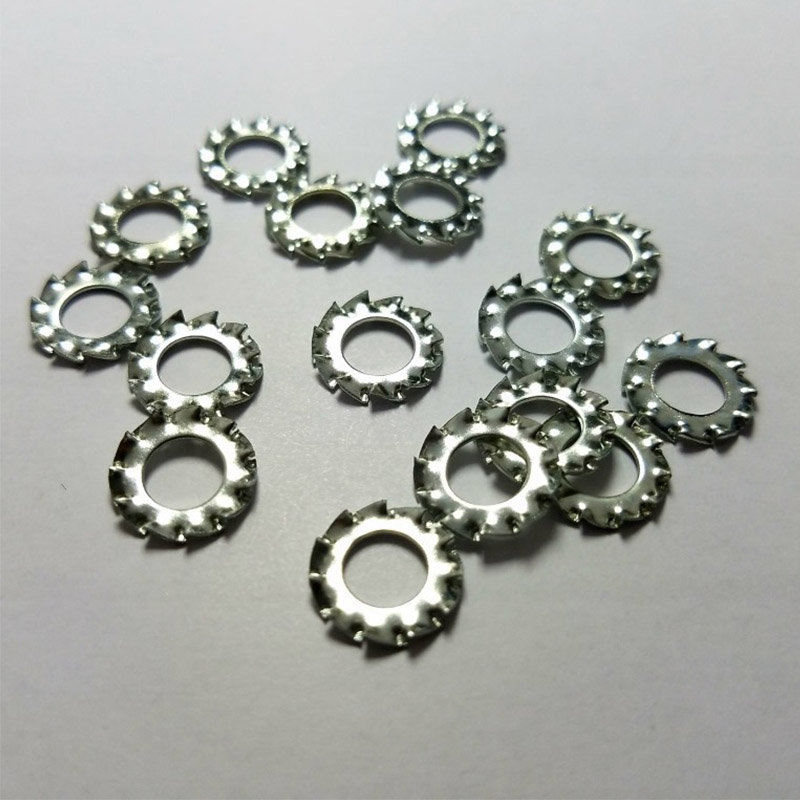
Lock Washers with Serrated Toothed
Xiaoguo® factory's Lock Washers with Serrated Toothed are compact and easy to store, and they work well in narrow installation spaces.We suggest you place bulk orders, which makes stock keeping easier and also gets you better unit prices.
Send Inquiry
Product Description
1)Do I need to use a torque wrench when installing Lock Washers with Serrated Toothed?
It is highly recommended to use. Just tighten according to the standard recommended torque for bolts or nuts.
(2)How can we prevent the gasket from scratching the surface of the workpiece?
The teeth themselves will bite into the surface, and even the slightest scratches cannot be completely avoided.
(3)What will happen if the washer is tightened too much?
Over-tightening will flatten the teeth completely, causing the washer to lose its elasticity and the anti-loosening effect to sharply decline.
(4)Do I need to clean the surface before installing a Lock Washers with Serrated Toothed?
Yes. The oil, iron filings, paint or oxide layer on the bolt head/ nut base and the workpiece surface should be removed.

Proper installation of the Lock Washers with Serrated Toothed is crucial for ensuring its anti-loosening effect and electrical conductivity.
(1)Clean the contact surfaces
Remove oil, iron filings, paint or oxide layers from the bottom of bolts or nuts, and the surfaces of workpieces.
(2)Confirm the direction of the washer (most important)
The tooth surface must face the contact surface of the bolt head or nut, and the flat surface should face the outside of the workpiece.
Reversing the installation will result in: The teeth cannot engage, completely losing the anti-loosening function.
(3) Install the washerPlace the Lock Washers with Serrated Toothed under the bolt head or nut, and keep it aligned in the middle of the bolt.
(4) Tighten by hand firstTwist the bolt or nut by hand until the washer touches the part surface lightly. The teeth won’t fully bite in at this moment.
(5) Tighten with standard torqueUse a torque wrench to tighten the bolt and nut per standard torque requirements.The washer teeth will sink into the surface on their own while tightening, no need to adjust the torque again.Don’t use an impact wrench with excessive force, or the teeth may slip and the Lock Washers with Serrated Toothed will deform.
(6) Check after installationIf used for electrical grounding, test the resistance between the bolt and the workpiece with a multimeter after tightening to guarantee stable conductivity. The resistance value should be close to 0 Ω.

| Size | 1.7 | 2.2 | 2.7 | 3.2 | 3.7 | 4.3 | 5.3 | 6.4 | 7.4 | 8.4 | |
| d | min=nominal size | 1.7 | 2.2 | 2.7 | 3.2 | 3.7 | 4.3 | 5.3 | 6.4 | 7.4 | 8.4 |
| max | 1.84 | 2.34 | 2.84 | 3.38 | 3.88 | 4.48 | 5.48 | 6.62 | 7.62 | 8.62 | |
| dc | max=nominal size | 3.6 | 4.5 | 5.5 | 6 | 7 | 8 | 10 | 11 | 12.5 | 15 |
| min | 3.3 | 4.2 | 5.2 | 5.7 | 6.64 | 7.64 | 9.64 | 10.57 | 12.07 | 14.57 | |
| t | 0.3 | 0.3 | 0.4 | 0.4 | 0.5 | 0.5 | 0.6 | 0.7 | 0.8 | 0.8 | |
| Number of Teeth | min | 9 | 9 | 9 | 9 | 10 | 11 | 11 | 12 | 14 | 14 |
| per 1000 unitsskg | 0.02 | 0.03 | 0.045 | 0.06 | 0.11 | 0.14 | 0.28 | 0.36 | 0.5 | 0.8 | |
| For Nominal Thread Diameter | M1.6 | M2 | M2.5 | M3 | M3.5 | M4 | M5 | M6 | M7 | M8 | |
| Size | 10.5 | 13 | 15 | 17 | 19 | 21 | 23 | 25 | 28 | 31 | |
| d | min=nominal size | 10.5 | 13 | 15 | 17 | 19 | 21 | 23 | 25 | 28 | 31 |
| max | 10.77 | 13.27 | 15.27 | 17.27 | 19.33 | 21.33 | 23.33 | 25.33 | 28.33 | 31.39 | |
| de | max=nominal size | 18 | 20.5 | 24 | 26 | 30 | 33 | 36 | 38 | 44 | 48 |
| min | 17.57 | 19.98 | 23.48 | 25.48 | 29.48 | 32.38 | 35.38 | 37.38 | 43.38 | 47.38 | |
| t | 0.9 | 1 | 1 | 1.2 | 1.4 | 1.4 | 1.5 | 1.5 | 1.6 | 1.6 | |
| Number of Teeth | min | 16 | 16 | 18 | 18 | 18 | 20 | 20 | 20 | 22 | 22 |
| per 1000 unitsskg | 1.25 | 1.6 | 2.3 | 2.9 | 5 | 6 | 7.5 | 8 | 12 | 14 | |
| For Nominal Thread Diameter | M10 | M12 | M14 | M16 | M18 | M20 | M22 | M24 | M27 | M30 | |
Hot Tags: Lock Washers with Serrated Toothed, China, Manufacturer, Supplier, Factory
Related Category
Send Inquiry
Please Feel free to give your inquiry in the form below. We will reply you in 24 hours.