
- English
- Español
- Português
- русский
- Français
- 日本語
- Deutsch
- tiếng Việt
- Italiano
- Nederlands
- ภาษาไทย
- Polski
- 한국어
- Svenska
- magyar
- Malay
- বাংলা ভাষার
- Dansk
- Suomi
- हिन्दी
- Pilipino
- Türkçe
- Gaeilge
- العربية
- Indonesia
- Norsk
- تمل
- český
- ελληνικά
- український
- Javanese
- فارسی
- தமிழ்
- తెలుగు
- नेपाली
- Burmese
- български
- ລາວ
- Latine
- Қазақша
- Euskal
- Azərbaycan
- Slovenský jazyk
- Македонски
- Lietuvos
- Eesti Keel
- Română
- Slovenski
- मराठी
- Srpski језик


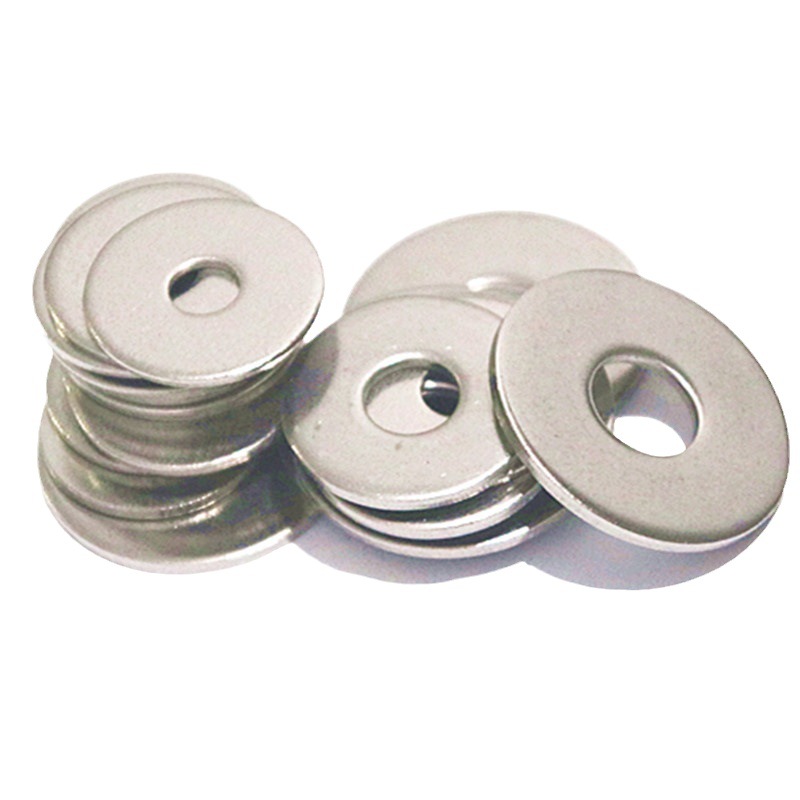
Large OD Flat Washer
Xiaoguo Inventory® Large OD Flat Washer has a smooth surface without burrs, fits tightly, and can be used in conjunction with sealing components to enhance dust-proof, oil-release, and water-proof performance.
Send Inquiry
Product Description
The Large OD Flat Washer and the Standard Flat Washer have significant differences in appearance, functions, and applicable scenarios.
| Project | Standard Flat Washer | Large OD Flat Washer |
| Inner diameter | 6.4mm | 6.4mm |
| Outer diameter | 12mm | 18mm |
| Thickness | 1.6mm | 1.6mm |
| Contact area | 1 times | 2.25 times |
| Distributing pressure | Generally, suitable for hard surfaces such as metals | Excellent, can effectively protect soft materials |
| Cost of raw materials | Low | Higher (larger in area) |
| Unit weight | Light | Heavier (same specification) |
Size Comparison (Taking M6 as an Example)

Usage steps
The usage method of the Large OD Flat Washer is not complicated, but following the correct operation sequence can ensure the best protective effect.
(1) Make sure the specs match
Check the bolt size – the Large OD Flat Washer's inner hole should be just a bit larger than the bolt's outer diameter.
Also check that the washer's outer diameter is big enough to fully cover the holes in the part you're fastening. If the hole is a long slot or has been worn out, the washer's outer edge needs to overlap the hole by at least 5 mm.
Think about the material and where it's going. For outdoor spots that are damp, near the ocean, or in chemical areas, go with 316 stainless steel. For general indoor use, 304 stainless or galvanized carbon steel will work fine.
(2) Clean the contact surface
Wipe off any oil, rust, paint chips, or sawdust from the area where you're working. Also make sure both sides of the washer are clean. If there's any rust-preventive oil on it, just wipe it off gently with a cloth.

| Mon | φ 16 | φ 18 | φ20 | φ22 | φ24 | φ27 | φ30 | φ33 | φ36 | φ39 | φ42 |
| d max | 17.27 | 19.33 | 21.33 | 23.33 | 25.33 | 28.33 | 31.39 | 34.62 | 37.62 | 42.62 | 45.62 |
| d min | 17 | 19 | 21 | 23 | 25 | 28 | 31 | 34 | 37 | 42 | 45 |
| dc max | 30 | 34 | 37 | 39 | 44 | 50 | 56 | 60 | 66 | 72 | 78 |
| dec min | 29.48 | 33.38 | 36.38 | 38.38 | 43.38 | 49.38 | 55.26 | 58.8 | 64.8 | 70.8 | 76.8 |
| h max | 3.3 | 3.3 | 3.3 | 3.3 | 4.3 | 4.3 | 4.3 | 5.6 | 5.6 | 6.6 | 9 |
| h min | 2.7 | 2.7 | 2.7 | 2.7 | 3.7 | 3.7 | 3.7 | 4.4 | 4.4 | 5.4 | 7 |
(3) Place the washer
Installation Location:Place a large-outer-diameter flat washer between the bolt head and the part to be secured.If soft materials such as wood, plastic, or thin aluminum are used,It is recommended to use large-outer-diameter washers on both the bolt head and the nut side.
Center Installation:Ensure that the bolt or nut passes through the center hole of the washer.Ensure the washer sits flush against the workpiece surface—it must not be tilted.
(4) Insert the bolt and hand‑tighten
Tighten the bolts or nuts by hand,Until the washer just touches the surface;Then adjust the position of the washer,Ensure it completely covers the hole.
(5) Tighten to the recommended torque
Correct Use of a Torque Wrench:Select the appropriate torque value and tighten gradually.During the operation, observe the washer carefully and make adjustments as necessary.
(6) Final check
Take a look at the Large OD Flat Washer to make sure it's sitting flat and properly in place.
Hot Tags: Large OD Flat Washer, China, Manufacturer, Supplier, Factory
Related Category
Send Inquiry
Please Feel free to give your inquiry in the form below. We will reply you in 24 hours.