
- English
- Español
- Português
- русский
- Français
- 日本語
- Deutsch
- tiếng Việt
- Italiano
- Nederlands
- ภาษาไทย
- Polski
- 한국어
- Svenska
- magyar
- Malay
- বাংলা ভাষার
- Dansk
- Suomi
- हिन्दी
- Pilipino
- Türkçe
- Gaeilge
- العربية
- Indonesia
- Norsk
- تمل
- český
- ελληνικά
- український
- Javanese
- فارسی
- தமிழ்
- తెలుగు
- नेपाली
- Burmese
- български
- ລາວ
- Latine
- Қазақша
- Euskal
- Azərbaycan
- Slovenský jazyk
- Македонски
- Lietuvos
- Eesti Keel
- Română
- Slovenski
- मराठी
- Srpski језик


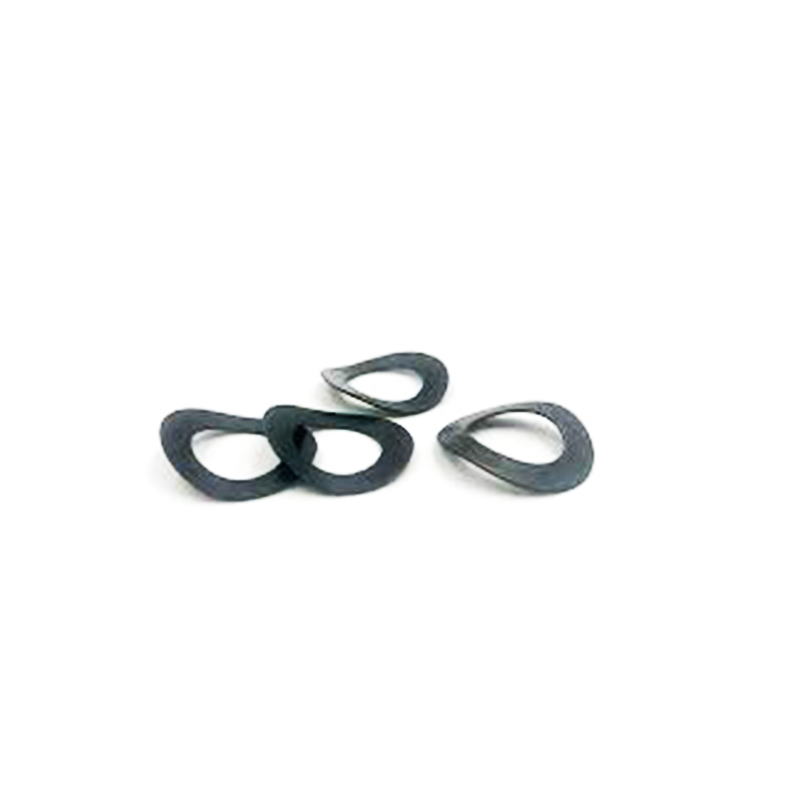
DIN137A M6 Curved Spring Washer
Choosing to purchase the DIN137A M6 Curved Spring Washer from Xiaoguo® can help you maintain the pressure when the contact surface is worn, reduce the maintenance frequency, thereby lowering the maintenance cost and improving work efficiency.
Send Inquiry
Product Description
The installation of the DIN137A M6 Curved Spring Washer is not complicated. The main steps are to place it in the correct position and tighten it to the appropriate compression level.
(1) Pick the right size
The DIN137A M6 Curved Spring Washer's inner hole should fit your bolt diameter.
Choose how many waves based on how much spring you need:
Single‑wave (DIN 137 A) – bends a lot but doesn't push back very hard.
Multi‑wave (DIN 137 B) – gives a smoother, more even push.
(2) Clean the surfaces
Wipe off any oil, rust, or paint from under the bolt head (or nut) and the part you're fastening. The surfaces need to be clean and flat so the washer gets squeezed evenly.
(3) Put the washer in place
Slide the DIN137A M6 Curved Spring Washer onto the bolt, under the bolt head (or under the nut).
Which way faces up? The curved side or the wave peak should touch the bolt head or nut.

(4) Hand‑tighten first
Screw the nut or bolt in by hand until the washer just touches the surface – you shouldn't see it bending yet. This step is to ensure that the threads are properly aligned.
(5)Tighten properly
Use a torque wrench and tighten the bolts according to the standard torque value.
The washer has been basically flattened by the force.
A simple way to determine this: when the free height of the washer is compressed by approximately 70% - 80%, the elasticity has been fully exerted.
Be sure to pay attention: Do not use an impact wrench to strike forcefully. This could easily cause the DIN137A M6 Curved Spring Washer to be pushed too far, resulting in permanent deformation and loss of elasticity.

| Mon | ɸ2 | ɸ2.5 | ɸ3 | ɸ4 | ɸ5 | ɸ6 | ɸ8 | ɸ10 |
| d min | 2.2 | 2.7 | 3.2 | 4.3 | 5.3 | 6.4 | 8.4 | 10.5 |
| d max | 2.45 | 2.95 | 3.5 | 4.6 | 5.6 | 6.76 | 8.76 | 10.93 |
| dc min | 4.2 | 5.2 | 5.7 | 7.64 | 9.64 | 10.57 | 14.57 | 17.57 |
| dc max | 4.5 | 5.5 | 6 | 8 | 10 | 11 | 15 | 18 |
| H min | 0.5 | 0.55 | 0.65 | 0.8 | 0.9 | 1.1 | 1.7 | 2 |
| H max | 1 | 1.1 | 1.3 | 1.6 | 1.8 | 2.2 | 3.4 | 4 |
| h | 0.3 | 0.3 | 0.4 | 0.5 | 0.5 | 0.5 | 0.5 | 0.8 |
Why choose Xiaoguo® as the customized partner?
Xiaoguo®'s DIN137A M6 Curved Spring Washer customization service covers all parameter dimensions ranging from inner diameter M2 to M100, and from spring steel to special alloys.
(1)Pre-cooperation design support: Participate in the elasticity estimation and selection of the gasket for the client when they provide the drawings, avoiding the cost of trial and error in the later stage.
(2) Flexible order quantities – Whether you need a small batch or tens of thousands of pieces, we've got stable production to get them to you on time.
(3) Everything in-house – We do it all ourselves: mold design, stamping, heat treatment, and surface finishing. No stepping out.
Hot Tags: DIN137A M6 Curved Spring Washer, China, Manufacturer, Supplier, Factory
Related Category
Send Inquiry
Please Feel free to give your inquiry in the form below. We will reply you in 24 hours.